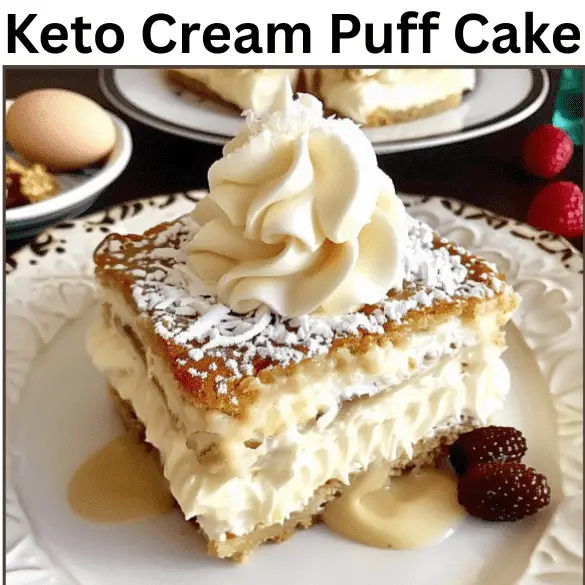

This Keto Cream Puff Cake is the heavenly combo of three delicious low-carb layers that leave every dessert lover happy & satisfied. As they can keep themselves on track for following their keto diet. The yummy cake features the base crust layer made of keto flours & sweeteners. The middle layer features almond milk, keto sweetener & thickener, while the topping is made of whipped cream + keto sweetener. As described, all the items are carefully chosen to be keto(low in carbs, high in fats). Each & every slice of this Keto Cream Puff Cake will amaze you with its creamy crunch & it is best served when chilled.
Free Keto Meal Plan: STEP-BY-STEP KETO DIET PLAN FOR BEGINNERS
NUMERICAL REVIEW:
- Diet: Ketogenic
- Time of preparation: 25 minutes
- Course: Dessert
- Cuisine: Fusion of American & European
- Working time(in total): Fifty-five mins
- Size/serving: One slice
- Time of cooking: Thirty mints.
- Yield in total: 9 slices(when 8 by 8 inches pan is used)
- Mode of cooking: Baking & stove-top
- Level of difficulty: Normal
TOOLS:
- A whisk
- Spatula(rubber)
- Normal saucepan
- Rack for cooling
- Paper of parchment
- Bowls for mixing
- Baking pan(8 by 8-inches)
- An electric mixer
INGREDIENTS:
CHOUX-STYLE CRUST:
- 1/4th tsp. of salt
- A cup of water
- 4 eggs
- Butter, half a cup
- 1/2 tsp. of xanthan gum
- Flour of almond, one cup
- 2 tbsp. of coconut flour
LAYER OF CUSTARD:
- A tbsp. of gelatin/2 tsp. of xanthan gum
- 2.5 cups of milk(almond)
- Essence of vanilla, one tsp.
- 4 yolks of egg
- A bit of salt
- 1/2 a cup of erythritol
- Flour of coconut, 2 tbsp.
TOPPING:
- 0.5 tsp. of vanilla essence
- Whipping cream(heavy), one cup
- 2 tbsp. of erythritol
Free Keto Meal Plan: STEP-BY-STEP KETO DIET PLAN FOR BEGINNERS
INSTRUCTIONS:
CRUST MAKING(CHOUX-STYLE):
- Warm up the oven(empty) at 200 °C & get to work.
- Cover the sides & bottom of an eight-by-eight-inch baking pan using the paper(parchment).
- Include the butter, water, & salt in a saucepan.
- Mix them & place the saucepan over the normal to full flame.
- When blend is boiling we will low the flame.
- Then include flour of coconut & almond along with xanthan gum in that water mix.
- Mix continuously till a thick dough forms.
- Turn the flame off & shift the saucepan to the counter.
- Allow it to cool down for ~four mins.
- Then start the addition of eggs.
- Add an egg & beat using a hand mixer till combined.
- Then add another egg & blend.
- Now, add the remaining two eggs & blend as directed above.
- The dough is formed now, shift it to the pan you have oiled at the start.
- Always remember to spread the dough in an even manner.
- Shift the baking pan to the oven (already hot).
- Leave them to bake till you see the golden & puffed-up crust (for ~thirty mins).
- After that, leave it to come to the surrounding temperature; meanwhile, prepare the layer of custard.
MAKING OF CUSTARD LAYER:
- Include the yolks of eggs, salt, flour of coconut, powdered erythritol, & milk of almond ina saucepan.
- Use a whisk to combine all of them, and then place the saucepan over a low flame.
- While on the flame, whisk it continuously till it begins to thicken(~ten minutes).
- At this moment, include gelatin/xanthan gum & whisk till it becomes smooth.
- After proper combining, keep it down on the counter & mix the essence of vanilla in it.
- Once it comes to the surrounding temperature, spread it on the cooled crust(choux-style).
- Shift it to the refrigerator for a couple of hours while you start making the topping.
WHIPPED TOPPING:
- Include powdered erythritol, vanilla essence, & heavy cream in a bowl.
- Combine them all & beat them till the formation of peaks(stiff).
- We would apply the whipped cream on the custard layer with piping bag.
- Shift the cake back in the refrigerator for an hour.
- After an hour, slice the chilled Keto Cream Puff Cake & serve!
TIPS:
- It is necessary to chill the crust; otherwise, it becomes soggy when you pour custard over it.
- Go for the addition of lemon zest/nutmeg for an additional twist of flavor.
- You may have the choice if you want to make the cake a day earlier to have the quick work next day.
- You may increase/decrease the amount of thickener according to your preference for custard thickness.
STORAGE DETAILS:
REFRIGERATION:
- Save the puff cake(leftover) in a box with a sealed lid. Keep that box in the refrigerator. Consume it chilled within ~five days. If you use it in the first three days, it will be best in the texture.
FREEZING:
- We can wrap in plastic wrap and save the crust in the freezer. Defrost & use it within sixty days for the assembling of the cream Puff cake.
We never advise you to freeze the assembled cake as the texture of the cream will be ruined upon defrosting.
FAQs:
What might be the reason for not puffing up my crust?
- First of all, carefully mix the eggs well.
- Next, make sure that the oven is preheated properly.
- The last reason is that you add eggs to the hot mixture, which makes the eggs scrambled.
Be careful of these steps, your crust will puff up perfectly.
Is that possible to make the non-dairy version of the above recipe?
- Swap the cream of coconut with the heavy cream and use vegan butter instead of dairy butter. That’s how your recipe becomes non-dairy.
Free Keto Meal Plan: STEP-BY-STEP KETO DIET PLAN FOR BEGINNERS
NUTRITIONAL FACTS/SERVING:
Size/serving: A slice (1/9th of total yield)
Calories: ~235 kcal
Carbs in total: Six grams
Fiber: 2 g
Net carbohydrates: Four grams
Fats: 21 grams
Sugar: Less than one gram
Proteins: 6 g
Sodium: 115 milligrams